
The layout and styling of flow reports and network diagrams such as the business question How will IT failure impact our business? can be changed by users who have been granted access to the Diagram Designer via an administrative user.
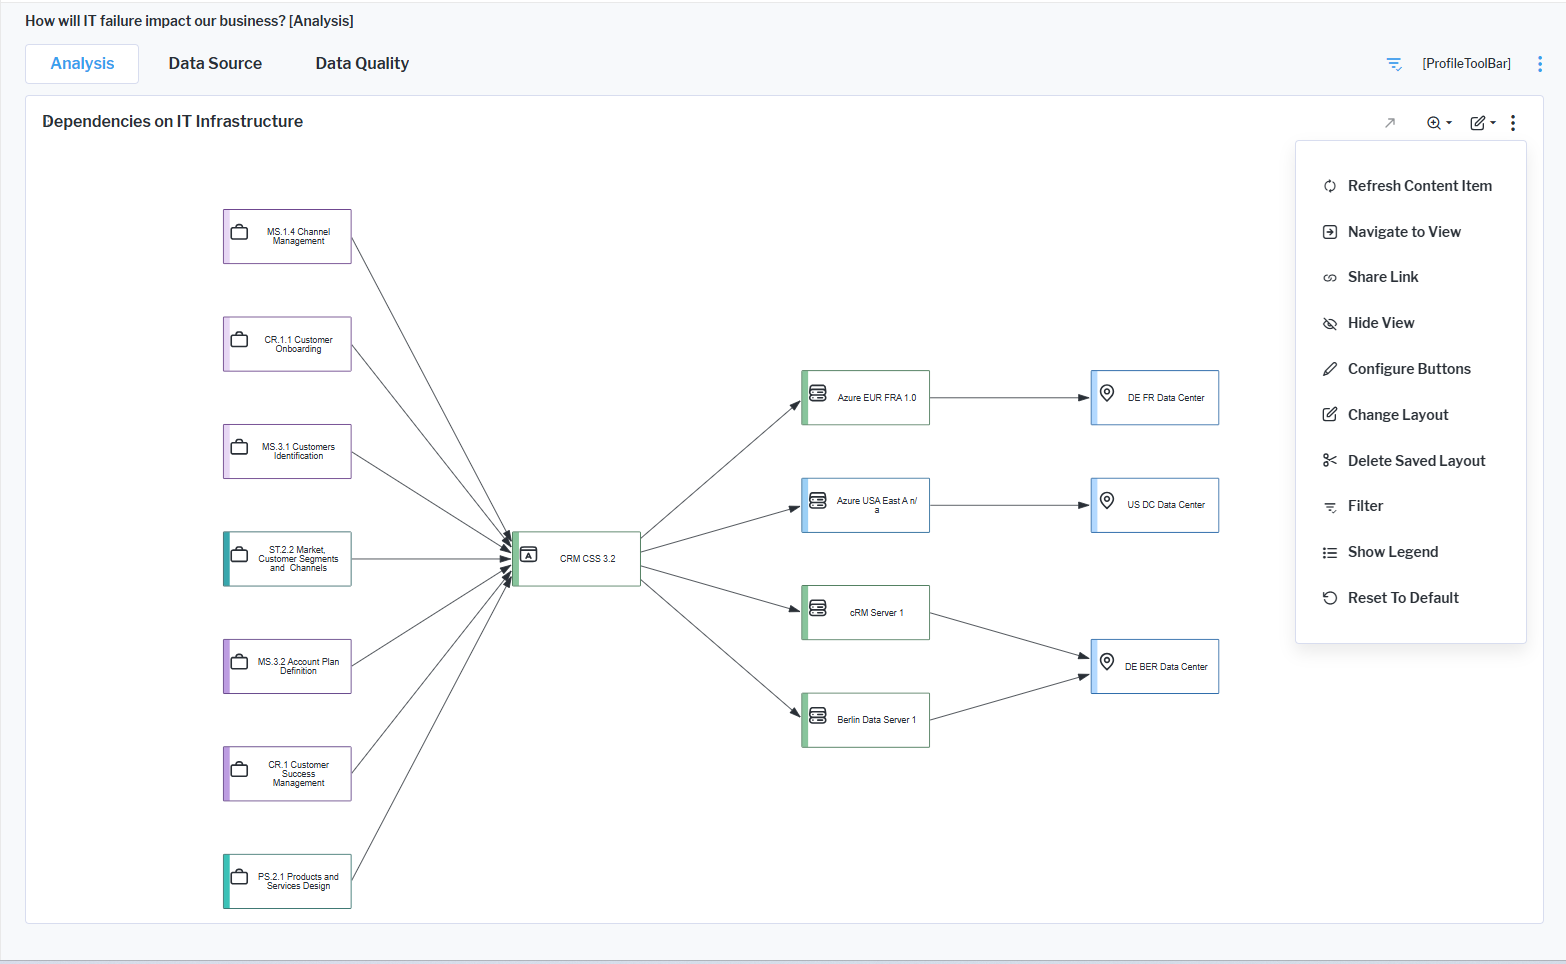
To update the report, Click the  3-dots button > Change Layout to open the Diagram Designer.
Change the size or placement of a diagram item
You can move or resize any individual diagram item or multiple diagram items. by
- To change the size of a diagram item, click it to display its handles. Drag any handle to the appropriate size.
- To move a diagram item, click to select it and then drag it to another location on the canvas.
- To select multiple diagram items, click and drag the mouse to create a selection area. All diagram items in the selection area are in the selection. Individual diagram items can be added by holding the CTRL key and selecting another diagram item. Click the selection area to move the diagram items. Drag the handle of the selection area to change the size of all of the diagram items.
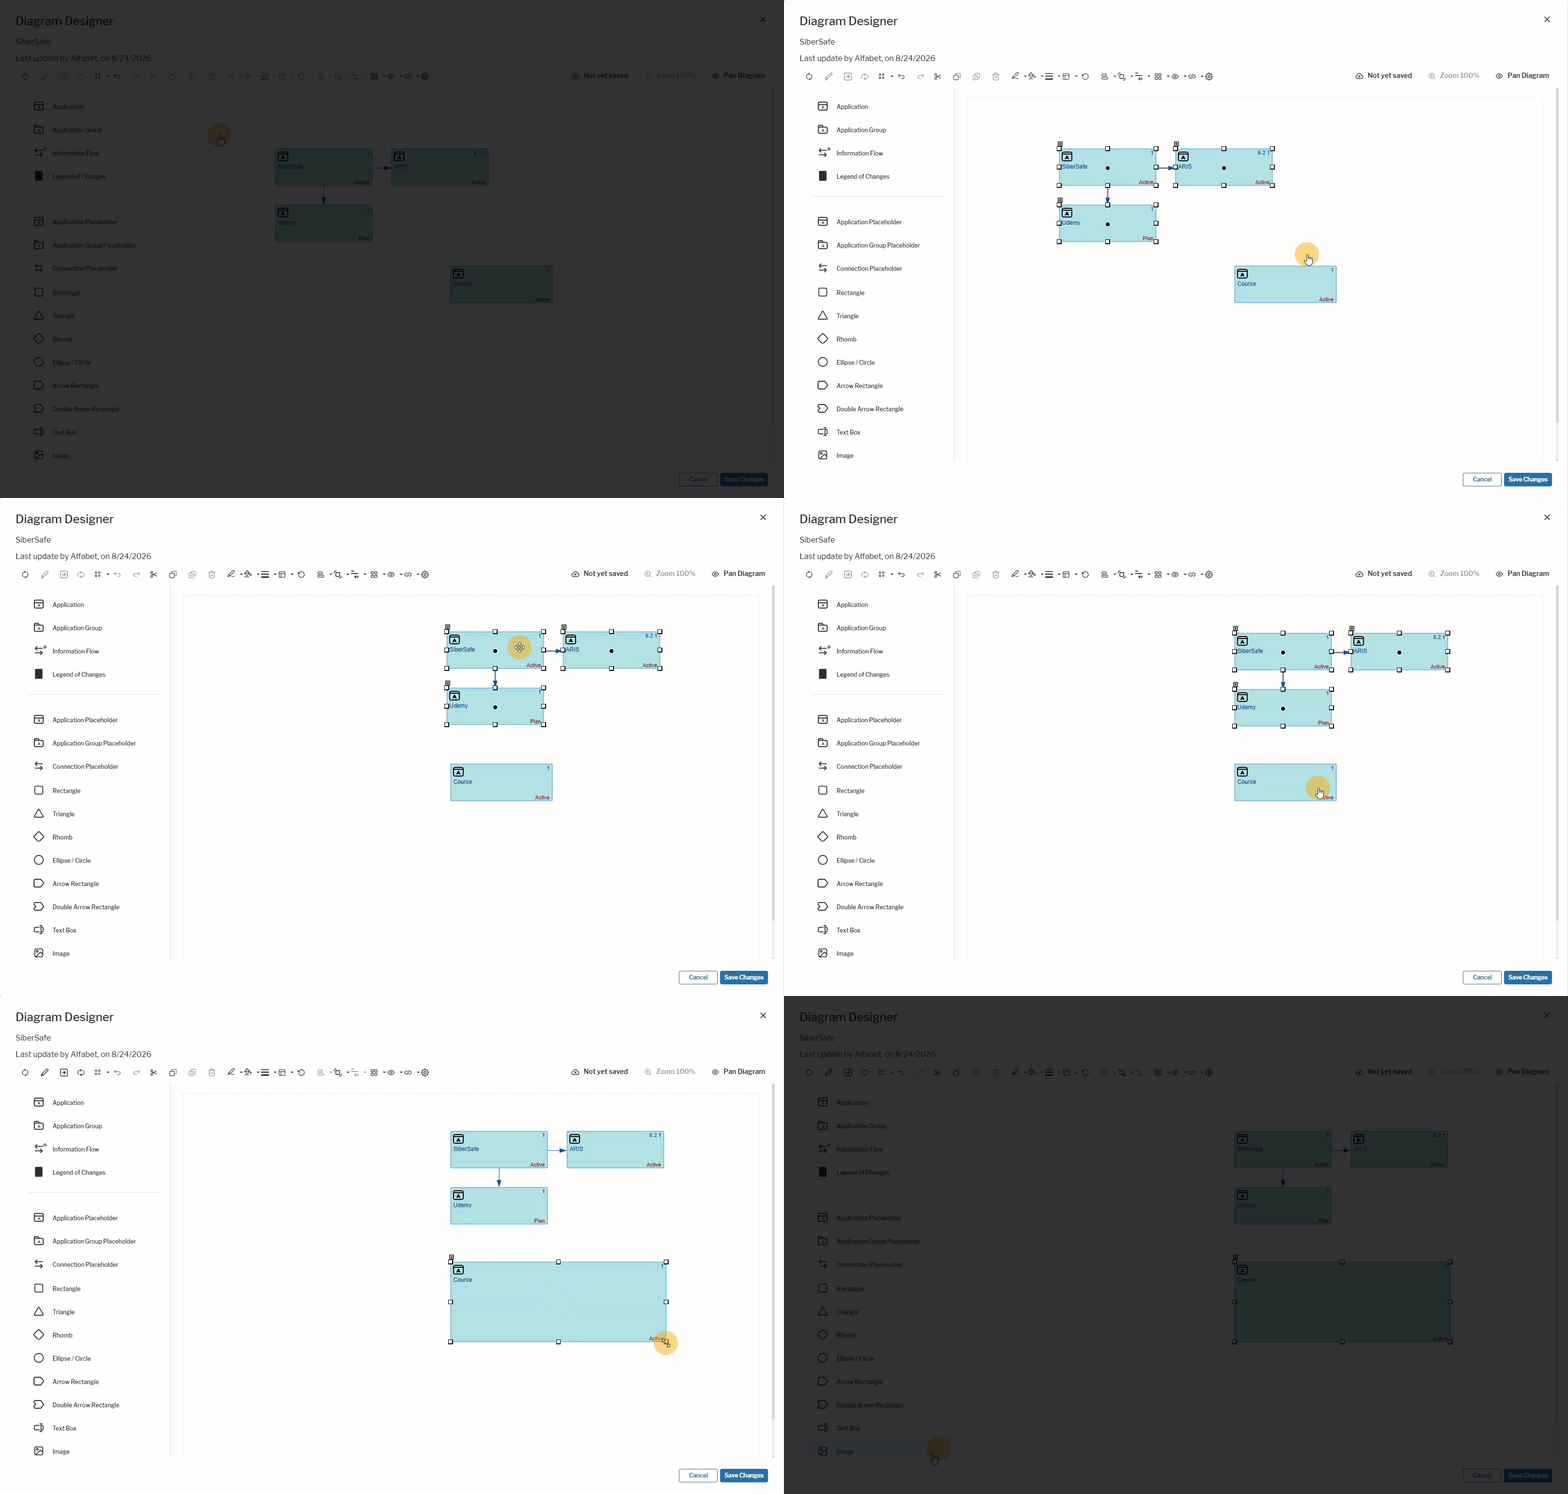 Click here to see how.
Add shapes to the diagram
You can add any shape available in the toolbox of the Diagram Designer. After adding a shape, you can modify its position, size, appearance (for example, color, border, or shadow), and text.
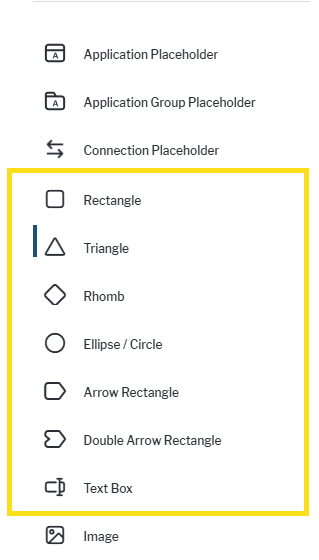
To add a rectangle, triangle, rhombus, ellipse/circle, arrow rectangle, double arrow rectangle, or text box:
- In the toolbox, select the required shape to add it to the canvas area. A vertical bar is shown next to the shape if it is selected.
- Drag the shape to the diagram.
- The shape is first displayed as a text box where you can enter text.
- Click in the text box and enter text.
- Click anywhere outside the text box. The shape is displayed with the text.
-
Change the look of the diagram items and shapes, as needed.
If you have added a triangle, drag the adjustment handle to change the direction of the triangle's apex (tip).
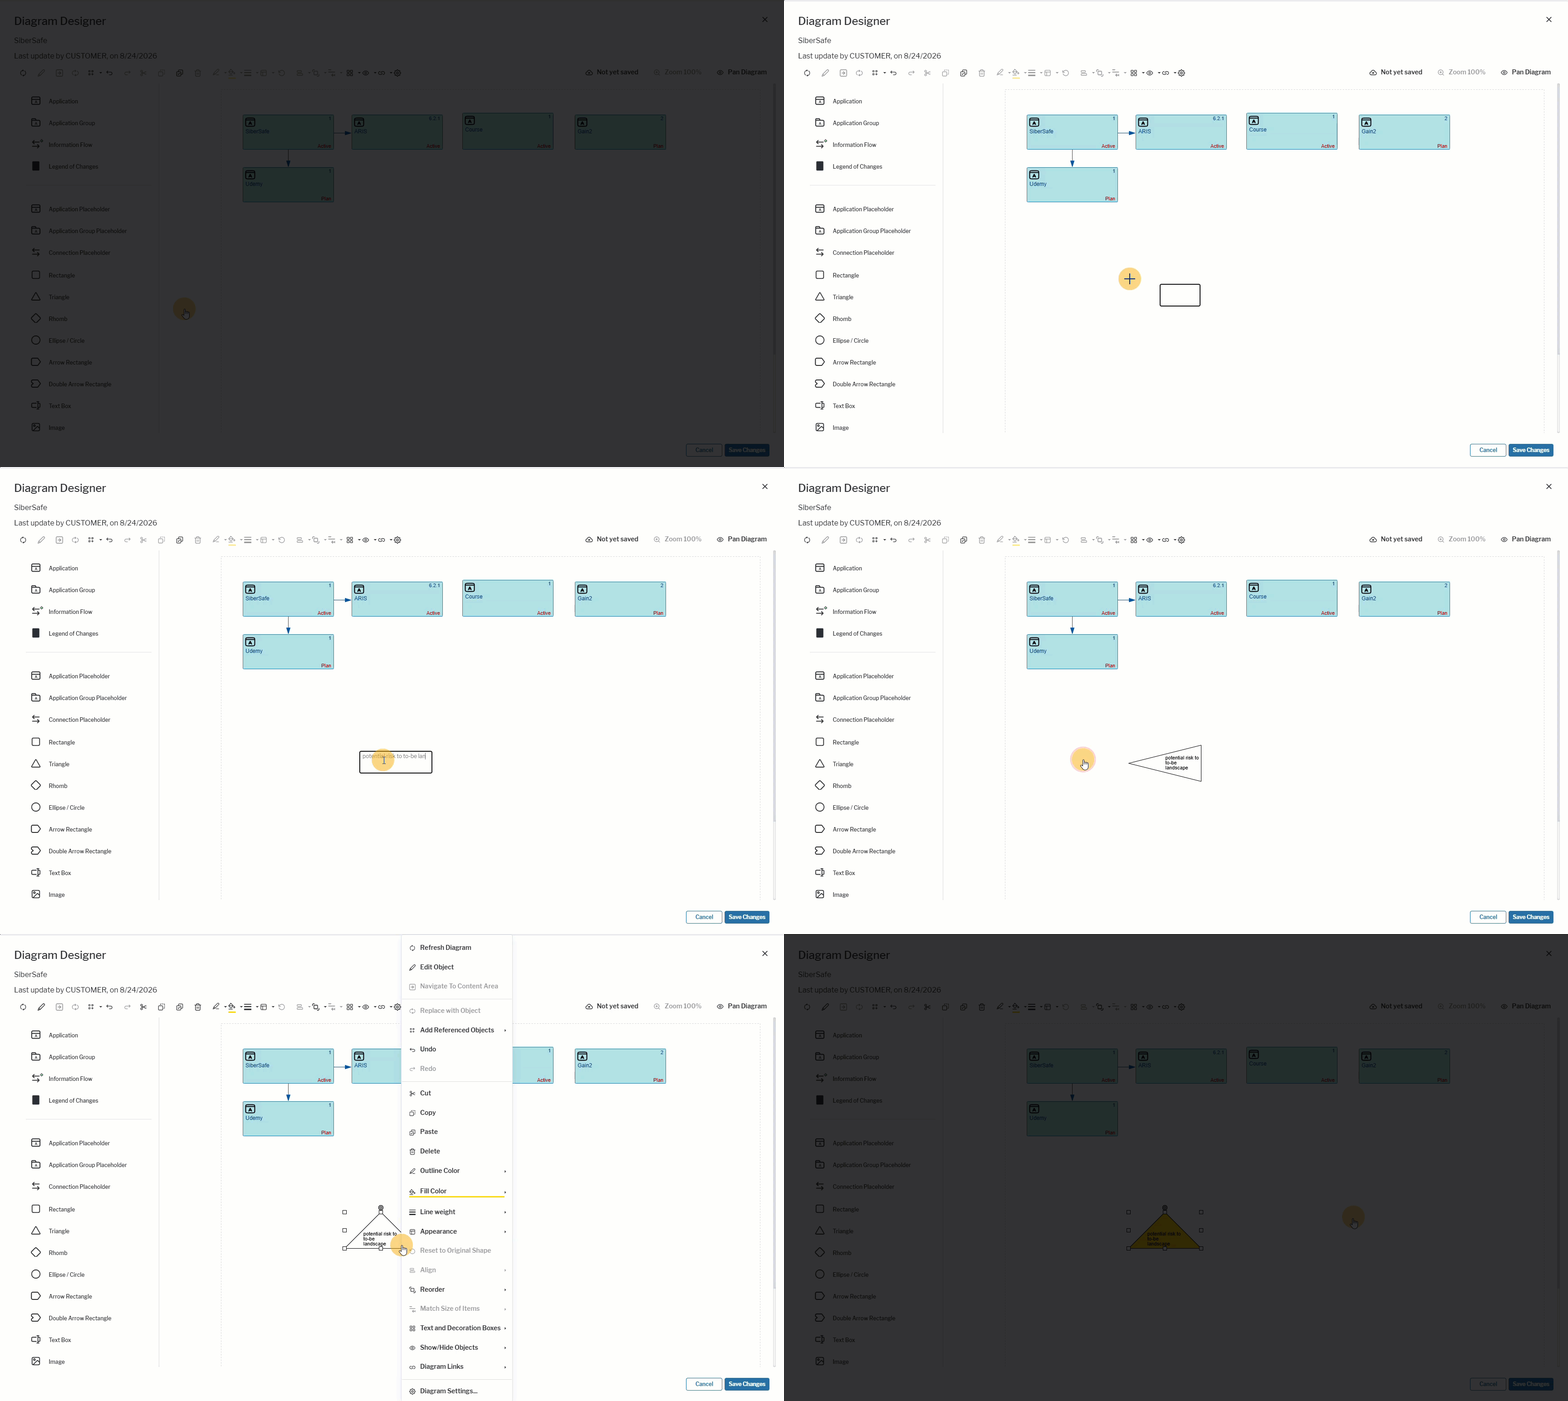 Click here to see how.
Change the look of diagram items and shapes
Various options are available that allow you to change the visual style of your diagram. When you select one or more diagram elements or shapes in the diagram and right-click, you will see the design options that are available for your selection. Note that you must save each change via the Save Changes button in the lower left corner.
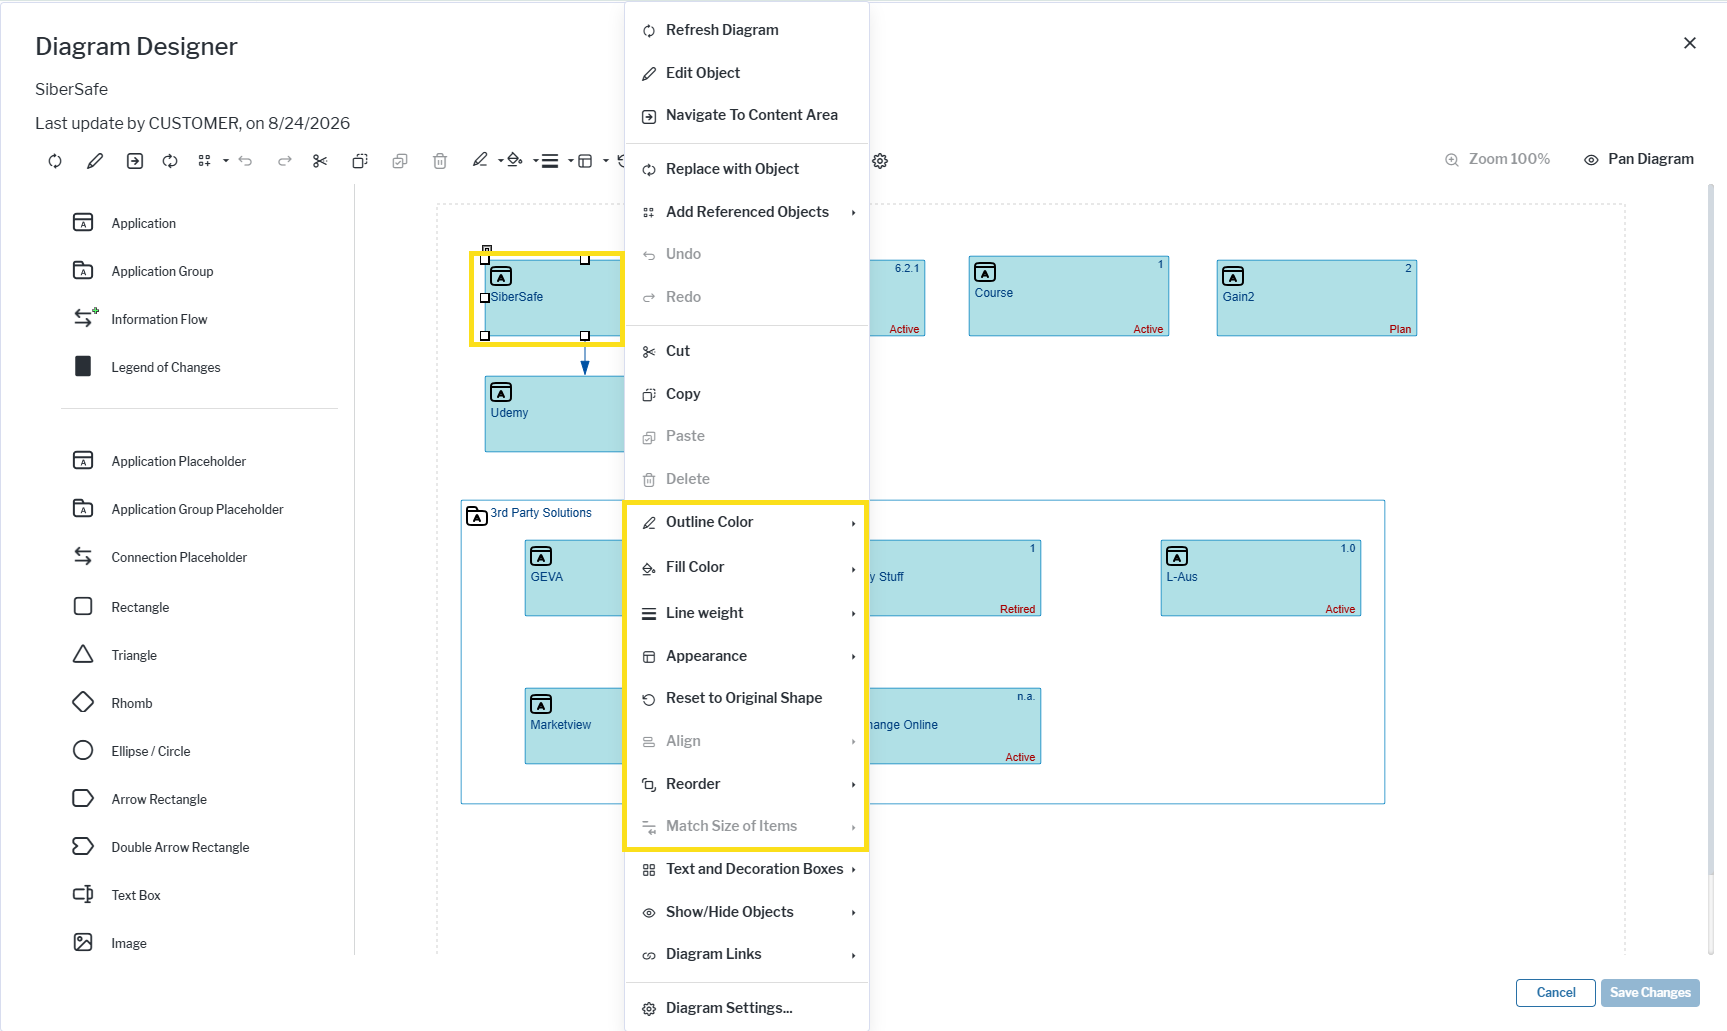
- Move a diagram item or shape to another position in the diagram. Click on the diagram item or shape so that all handles are displayed. Drag the diagram item or shape to the position you desire.
- Change the size of a diagram item or shape. Drag the handle of the diagram item or shape to the size you desire.
- Select multiple items at once to efficiently apply visual changes to the diagram. Drag the mouse around multiple diagram items to create a selection area. All objects within the selected area will be included in the selection. Diagram items can be individually added to the selection by holding the CTRL key while clicking.
- Add color to a diagram item or shape with color. Select one or multiple diagram items and right-click > Fill Color to choose a color from the palette. Select Outline Color to specify the color of the border of the diagram item. You can also select Outline Color to change the color of connections..
- Change the line weight of borders and lines. Select one or multiple diagram items or connections and right-click > Line Weight. Select a weight for the border or connection and define whether it should be solid, dashed, or dotted.
- Bring a diagram item or shape forward or backward. Select the diagram item or shape you want to move and right-click > Reorder . Select Bring to Front or Send to Back.
- Align diagram items and shapes. Click and drag the mouse to select multiple diagram items or press the CTRL key and select the diagram items and shapes that shall be aligned. Right-click > Align to align the selected diagram items and shapes or distribute them horizontally/vertically.
- Match the size of diagram items and shapes. Click and drag the mouse to select multiple diagram items or press the CTRL key and select the diagram items and shapes whose sizes shall be changed. Right-click > Match Size to specify how to change the size for all selected items.
Undo your changes
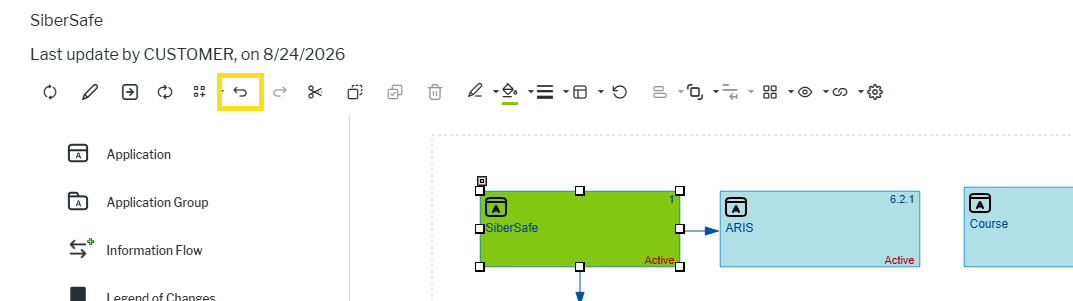
In the toolbar, the  Undo button and
  Redo button let you revert the diagram to a previous state or return the unsaved changes in the diagram. This lets you experiment so that you can revert to a different layout or coloring of diagram items. the Undo functionality cannot used after the Save Changes button.
The Undo button cannot be used to remove an information flow that you created in the context of the diagram. The information flow must be deleted if you no longer want it in the diagram.
Save the diagram
You can leave the diagramming tool at any time and later come back to continue designing the diagram. The saved diagram will be visible in the diagram displayed in the user interface (for example, in the Application Landscape Diagram view).
All changes made in the context of the diagramming tool are saved to the repository. If a diagram is modified by another user while you are editing it, saving the diagram may overwrite the changes made by that user.
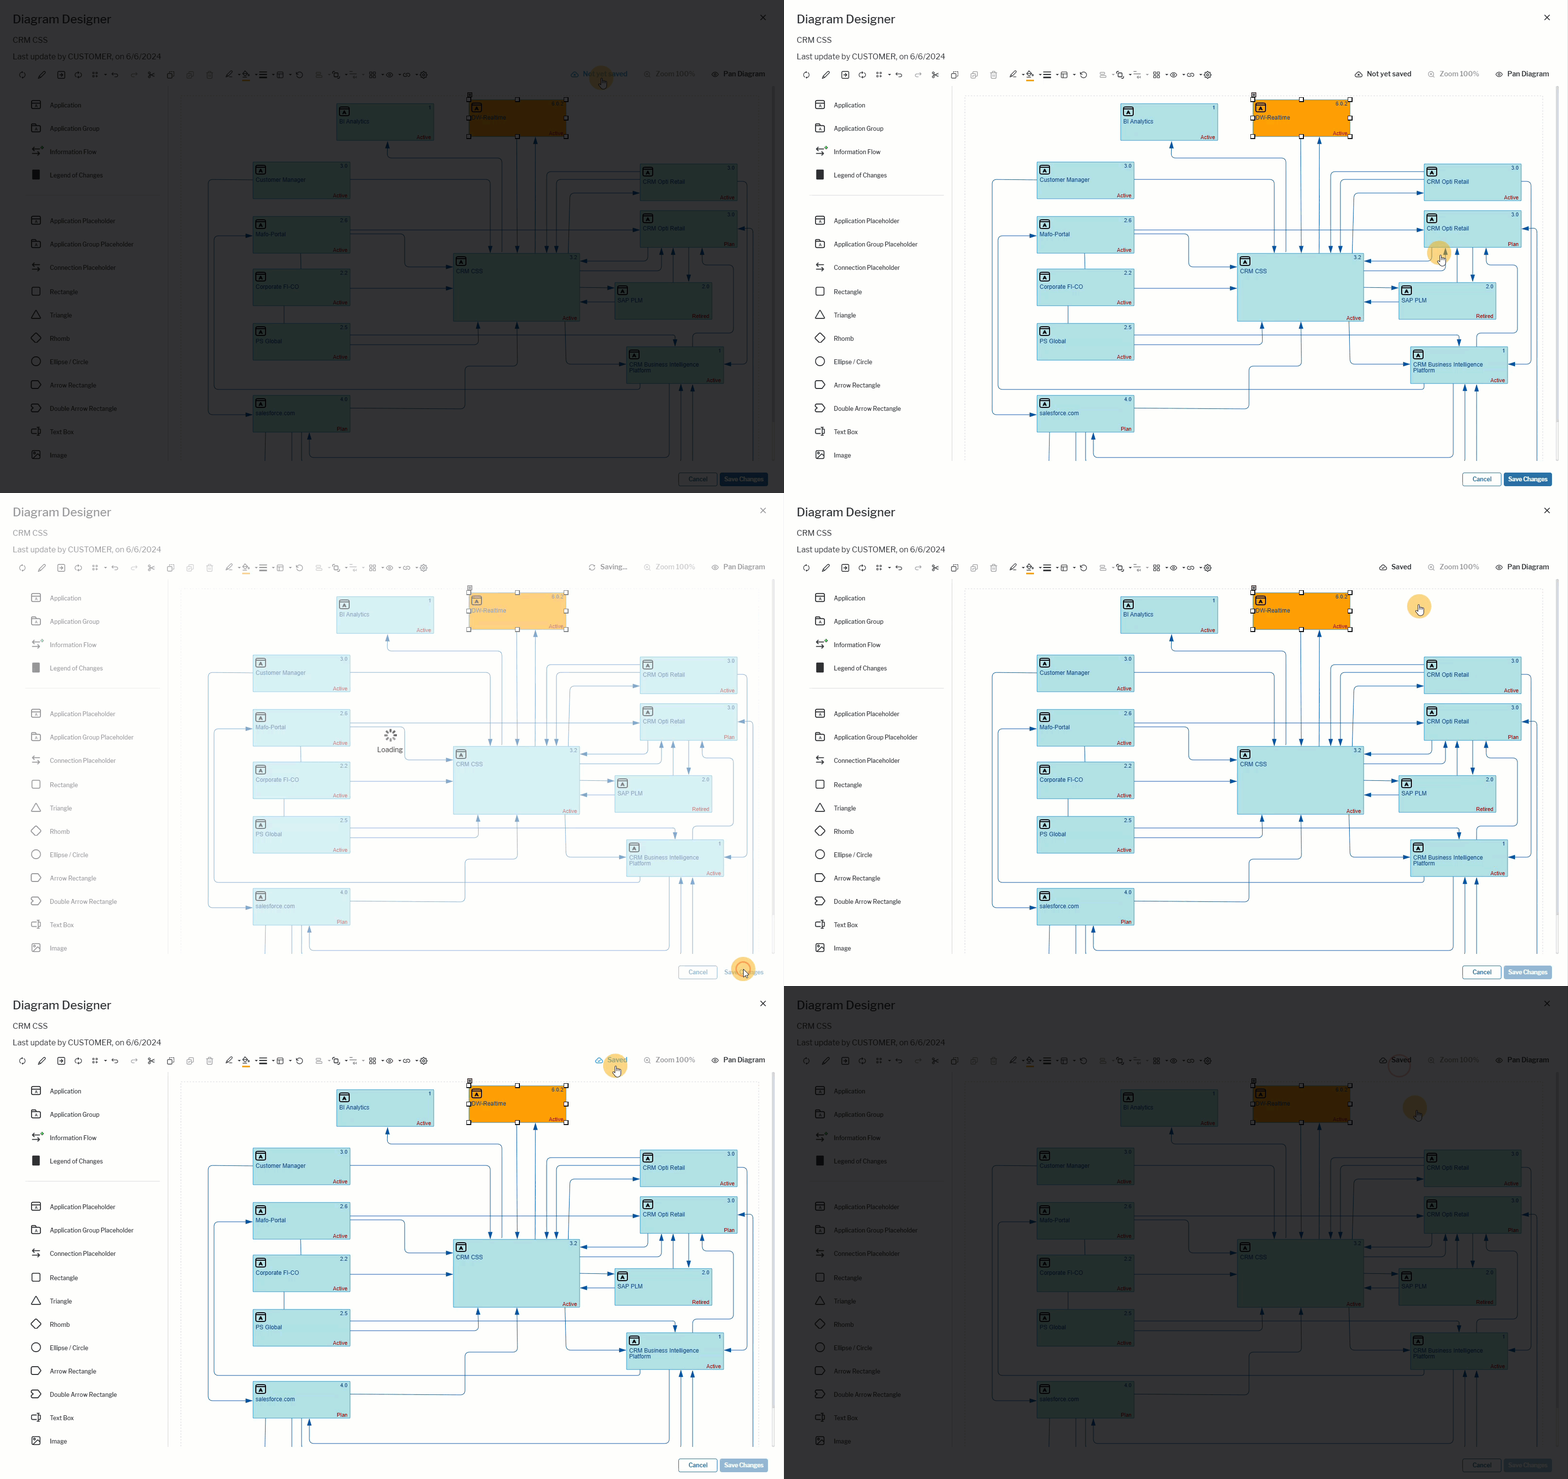
- A status message on the left side of the toolbar displays Not yet saved when the diagram contains unsaved changes. You can undo any changes via the as long as the diagram is not saved via the Save Changes button.
- To save the diagram, click Save Changes in the lower-right corner of the diagram. The status update in the from Saving to Saved. To close the diagram after saving your changes, click X in the upper-right corner. The Diagram Designer closes and the updated diagram is displayed in the user interface.
- To close the diagram without saving your changes, click the Cancel button in the bottom right of the diagram. The Diagram Designer closes and any unsaved changes are discarded.
 Click here to see how.