Create a job schedule to compute the indicator
This configuration is only required for computed indicators. Indicator computation can be done manually for the computed indicators of a single object in the evaluation views and in property groups and cards in content areas. To make sure that indicator values are always up-to-date, schedule a job that is executed at regular time intervals, like for example once each night, to compute all indicators for an object class that are based on a defined evaluation type and indicator type.
- Go to Administration > Job Schedule.
- In the toolbar, click New > Create Job Schedule.
- In the Stereotype Selector that opens, select Rescan Indicator Job Schedule.
- Define the following:
Basic Data tab:
- Name: (Mandatory) Define a unique name for the job schedule. It is not possible to define two job schedules with the same name, even if the type of job schedule is different.
- Description: Provide a meaningful description about the purpose of the job schedule.
- Define the attributes in the Configuration field:
- Class: (Mandatory) Select the object class or object class stereotype that the evaluation type of the indicator is assigned to. The drop-down list includes all object classes which have computed indicators assigned and an option to compute global indicators.
- Evaluation Type: (Mandatory) Select the evaluation type that the indicator is assigned to.
- Indicator Type: (Mandatory) Select the indicator type that has the indicators that will be computed.
- Report: Leave this field empty.
Schedule tab:
- In the Start Time field, define at which time of the day the job shall be executed. If the job shall be executed daily, weekly, or monthly, this is the execution time for each recurrent execution. If the job shall be executed hourly, the execution starts at the specified time and is then repeated in the interval specified for the recurrence pattern.
- Define one of the following recurrence patterns:
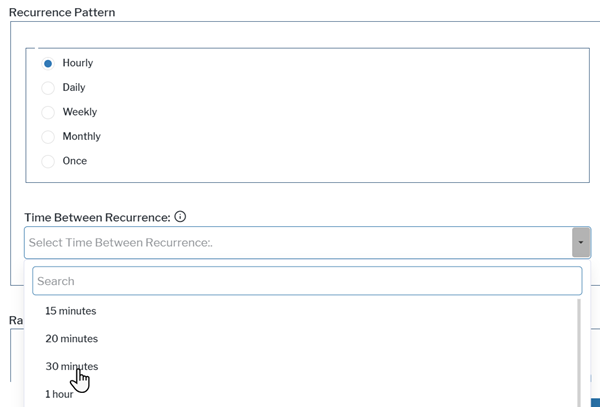
Hourly recurrence
- Recurrence Pattern: Select Hourly.
- Select the time between executions in the Time Between Recurrence field.
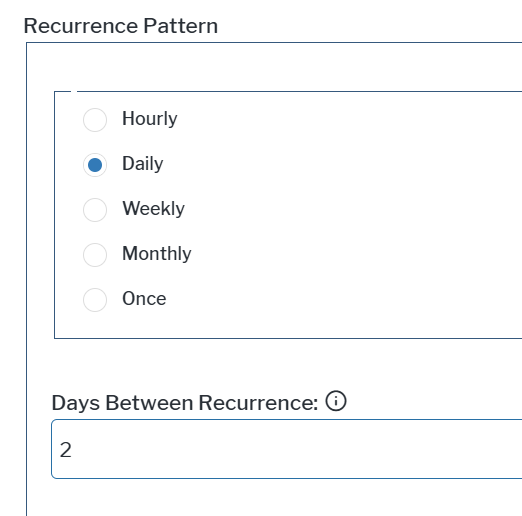
Daily recurrence, including gaps of multiple days between occurrences.
- Recurrence Pattern: Select Daily.
- Enter the number of days between executions as integer in the Days Between Recurrence field.
Weekly recurrence including gaps of multiple weeks between occurrences and multiple recurrences each week at defined days of the week.
- Recurrence Pattern: Select Weekly.
- Enter the number of weeks between executions as integer in the Week Between Recurrence field.
- Select one or multiple weekdays at which the job shall be executed in the Day(s) in the Week field.

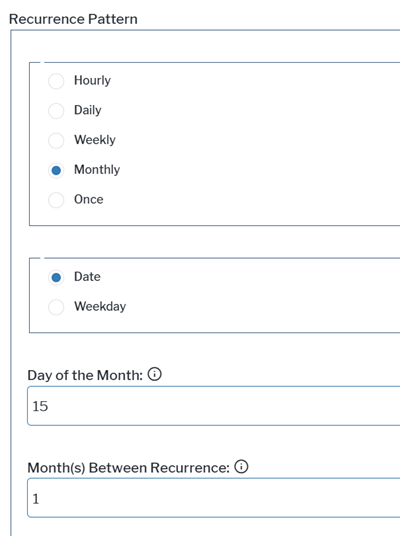
Monthly recurrence including gaps of multiple months between occurrences. Execution is limited to one time per month.
- Recurrence Pattern: Select Monthly.
- Select Date to schedule job execution at a specific day of the month, like, for example, the second day of each month. You need to specify the following two fields in the Recurrence Pattern box:
- Day of the Month: Enter the day of the month the job shall be executed with an integer between 1 and 31.
- Month(s) Between Recurrence: Enter the number of months between executions as integer.
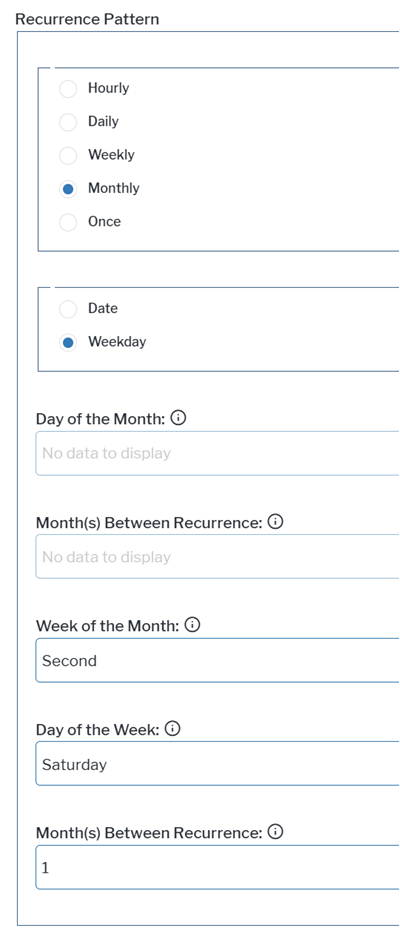
- Select Weekday to schedule job execution at a specific weekday of a specific week of the month. Execution is limited to once per month or every few months. You need to specify the following three fields in the Recurrence Pattern box:
- Week of the Month: Select which week of the month the job shall be executed.
- Day of the Week: Select the weekday the job shall be executed.
- Month(s) Between Recurrence: Enter the number of months between executions as integer.
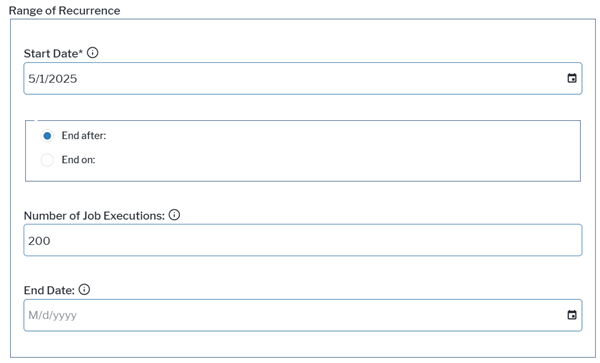
- Select the start date for job execution in the Range of Recurrence > Start Date field.
- Define how long the job schedule shall be executed in the Range of Recurrence box.
- If you would like to end execution on a specific date, select End on and select the end date in the End Date field.

- If you would like to end execution after a defined number of recurrences, select End after and specify the overall number of recurrences as integer in the Number of Job Executions field.
- If you would like to end execution on a specific date, select End on and select the end date in the End Date field.
- Optionally, you can define the following:
Activate verbose logging to analyze execution issues. Set the checkmark for the Verbose Logging attribute in the Basic Data tab. Only activate verbose logging temporarily for troubleshooting. Verbose logging leads to a decrease in performance and should not be used for the daily execution of jobs.
Receive a warning if job execution is too long. Define a maximum expected execution time for the job in the Expected Execution Time [min] field. You will receive a warning in the notification if the job execution exceeds the configured time. Job execution is finished even if the configured time has elapsed.
Change the user receiving job execution notifications. By default, you will receive notifications about the success of job execution when you are logged in with the Portfolio Admin user profile. Click here for information about how to find your notifications . In the Execution Info tab, you must define both of the following fields to change the notification recipient. In the Executing User field, define the user who shall receive the notifications. In the Executing User Profile field, specify the user profile that the user must be logged in with to receive the notifications.
Configure the job to wait for the results of another job. You can specify that the job execution shall be delayed if other jobs that are scheduled to be executed prior to the current job are not yet finished. For example, two different indicators are calculated to calculate a third indicator. You can then configure the job for the calculation of the third indicator to wait for the other calculation of the first two indicators to finish.
- In the Execution Info tab, click the New button above the Dependent Jobs table and select Create New Job Dependency.
- Select the job schedules the current job schedule depends on and click OK.
- In the Maximum Wait Time [min] field, enter a maximum time above 5 minutes that the job execution can be postponed. If a job of the current schedule shall be executed while a job defined in the Dependent Jobs field is still running, the execution of the job will be shifted in five minute intervals until the dependent jobs are finished or the maximum wait time is reached. If the job could not be executed during the maximum wait time, job execution will be cancelled and an error message will be written to the log file. The next execution of the job is scheduled according to the settings in the Schedule tab of the job schedule editor.
Start one job after execution of another job.You can configure one job to be started by another job. You need to configure both jobs. Configure the job to be executed first with a time schedule.
- In the Execution Info tab, click the New button above the On Completion Jobs table and select Add. Select the job that shall be started on completion of the current job.
- Configure the indirectly triggered job without an own job schedule. In the Basic Data tab of this job, select the Indirectly Triggered checkbox.
After having created the job schedule, you can use it as a template for creating new job schedules. Select the job schedule in the table and click New > Create Job Schedule As Copy from the toolbar.